Insulation upgrades for 80s house maximize comfort at minimal cost
August 15, 2022
Updated January 13, 2023
The framing and carpentry were complete. Windows and doors had been installed. And with the drywall removed, it was time for the next phase of Colleen and Shane’s deep energy retrofit of their forever home’s building envelope—an insulation upgrade.
Often overlooked, insulation may not make the neighbours green with envy as a new bespoke kitchen might, but for homeowners Colleen and Shane, who live in the house along with their two kids every day, they can’t say enough good things about how the new insulation transformed their home.
If you missed part one or two of our blog series, catch up by starting with our first blog about their pre-upgrade EnerGuide® home energy evaluation and DIY demolition.
It’s all about comfort and energy savings
The couple wanted to salvage as much of the home’s existing insulation as they could to save money and reduce waste. Luckily, their insulation contractor determined that most of the exterior wall insulation was still in good shape, except for a few areas of concern (like an old bee’s nest) that needed to be replaced.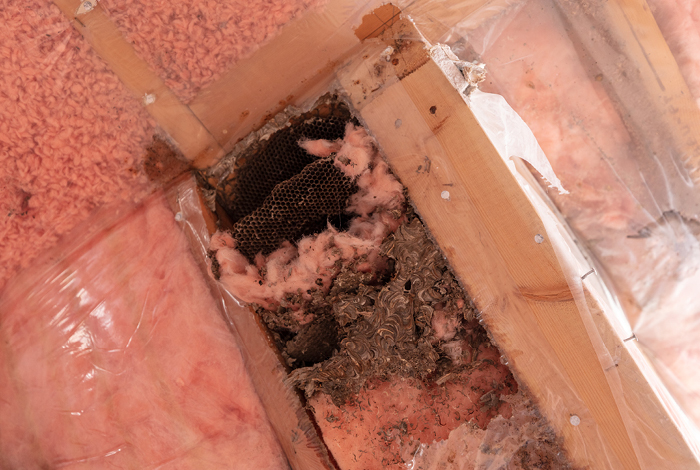
The insulation upgrade included first sealing all the gaps and holes, replacing the attic insulation, spray foaming awkward areas and adding an innovative insulation product to the exterior of the home. Even with all this work, which took eight days to complete, the project took only a small portion of Colleen and Shane’s total renovation budget. But the difference it made to the home, the couple say, was worth much more than that. “Our home not only feels different in that it’s much more comfortable all year round, it even sounds different too,” said Colleen.
Spray it, blow it, batt it and sheath it
There are a lot more insulation options nowadays than just pink bales of batt insulation. What you and your contractor choose will depend on the area(s) in your home you’re insulating. Here are the types used in Colleen and Shane’s home and where they were used.
Getting into the nooks and crannies: spray foam
For insulating the tiny gaps between the new windows and the rough window openings and for other gaps or wall penetrations (e.g. dryer vents), spray foam can be a good option to get into the nooks and crannies. As well, the couple had the home’s three dormers spray foamed. “The insulation contractor recommended to spray foam in these areas as they said batts wouldn’t be able to provide proper air sealing due to the way the dormers had been designed,” said Colleen.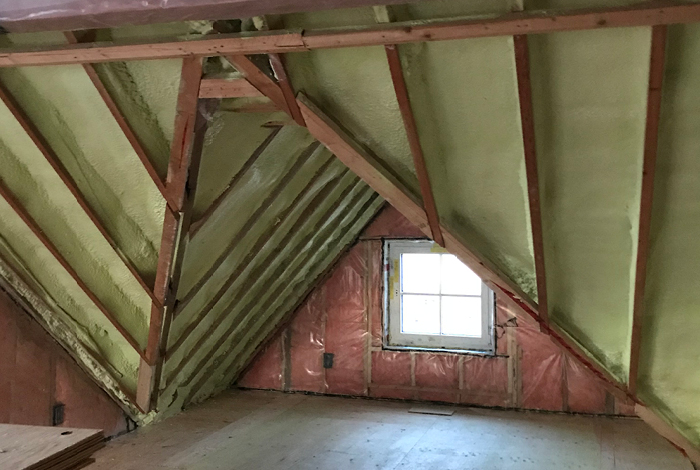
Spray foam surrounds the dormers in one of the kids’ bedrooms.
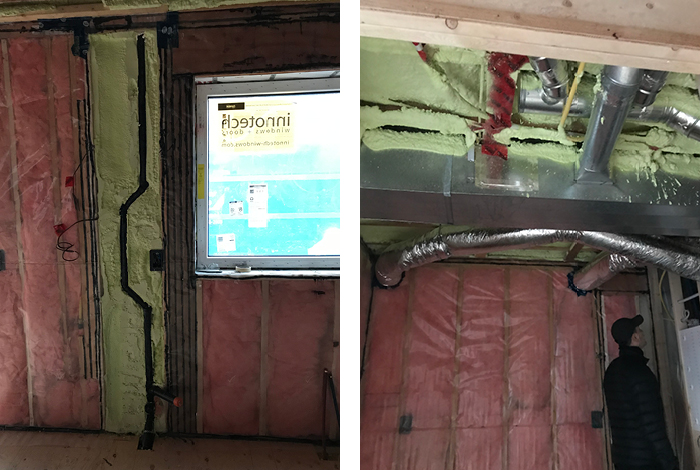
Spray foam can be a good option for air sealing around pipes, ducts and conduits.
Sayonara to a history of former attic inhabitants: blown-in
As we mentioned in our first blog, when Colleen and Shane moved into the house they had some resident rats removed from the attic by a pest company. “As the attic had rats, we figured there must’ve been other critters living up there in the previous 40 years, so we knew that all the old insulation had to be removed during demo,” said Shane.
“When we started demolishing the ceiling below the attic, we weren’t surprised when we found the remnants of said rats, but there was also evidence of other previous occupants, like birds and more bees!” said Colleen.
Once the drywall for the new ceiling was added, the insulation contractor used blown-in insulation in the attic above. Blown-in insulation is a loose material and it can fill around obstructions and provide a continuous blanket of insulation.
A clever trick to meet code while not forfeiting interior space: sheathing
Because the home was being extensively renovated, Colleen and Shane were required to bring the insulation’s thermal values up to the current BC Building Code. Their home, built in the 1980s, used 2” x 4” studs for the exterior wall framing. Today, the code calls for 2” x 6” studs to allow for the additional insulation required to meet required insulation R-values.
“This meant we would’ve had to build out all our exterior wall studs with 2” x 2” studs. We would’ve lost valuable floor space doing that,” said Colleen.
But an engineer she was chatting with at work about her home reno- suggested she look into insulation sheathing, which can be installed on the outside of the house. As Colleen and Shane had the brick façade, chimney and vinyl siding all removed from the home’s exterior, they realized insulating from the exterior side of the house would be a great option for them.
“It meant we didn’t have to build out the wall studs,” said Colleen. “If you’re replacing a home’s siding it’s a no-brainer. Anyone replacing their home’s siding should seriously consider adding this type of insulation as well,” she added.
“But there’s a science and skill required to installing the board correctly to maximize its insulation values and prevent mould, water damage and air penetration,” said Shane. “I wouldn’t recommend anyone try to DIY it,” he advised.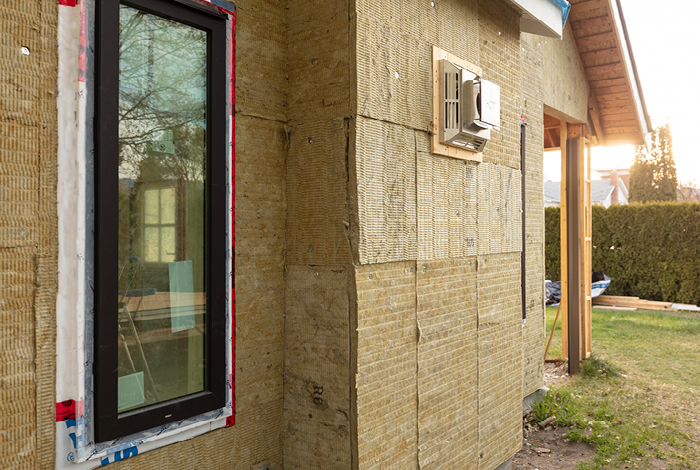
Exterior insulation sheathing being installed on the outside of the walls of the home. If you’re replacing your home’s siding, you might want to also add insulation to the exterior to improve the durability and heat resistance of the building envelope.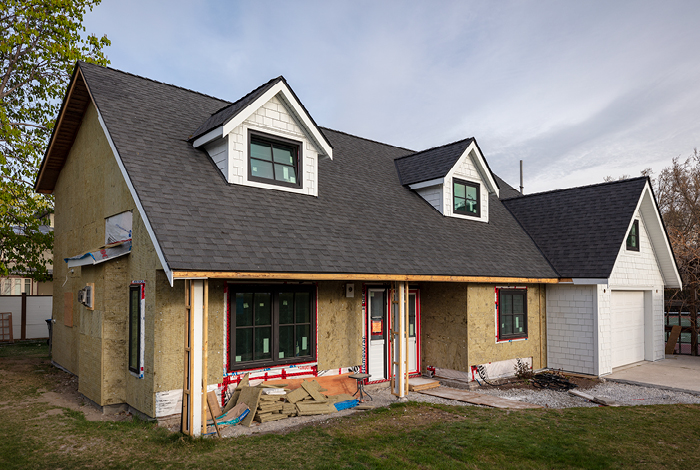
Another view of the home. The new windows look beautiful and the exterior insulation sheathing adds another layer of protection from the outside elements.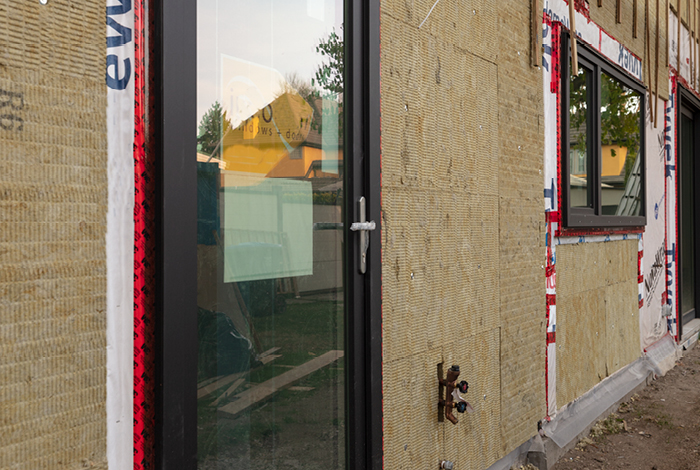
New doors and windows and exterior insulation sheathing on the back of the house.
Colleen and Shane’s advice for your insulation upgrade replacement
Planning your own insulation upgrade project? Here’s some advice from Colleen and Shane.
- Get an energy evaluation A pre-upgrade EnerGuide® home evaluation will determine where the areas of air leakage are in your home. This way you’ll have a better idea of what areas to focus on first when insulating and you can also tell your contractor, who can recommend the right type of insulation for the job.
- Hire a pro Insulation may look like it’s easy to install, but there really is a science to installing it properly. You should only use trained and experienced contractors, as they’ll ensure the insulation and supplementary products (e.g. vapour barrier) are installed in a way that prevents any water ingress and mould and also ensures that the insulation performs at the R-value it is intended to. Don’t believe us? Read one homeowner’s cautionary tale.
- Qualify for rebates1 We offer up to $5,5002 per home in insulation rebates, but to qualify you must follow all the requirements. After all, we want you to get maximum efficiency and energy savings out of your insulation and receive your rebate in a timely fashion.
- Need a quick win? If you’re not undertaking a major renovation and removing drywall and/or exterior siding, you can still take advantage of the benefits good insulation can provide. Attics and exposed floors (e.g. a room in your home above an unheated space like a crawlspace or unfinished garage) don’t require any demolition and the job can be done fairly quickly and affordably.
“Have your contractor document on your invoice the square footage and R-value of the insulation they installed and in what areas (e.g. basement, attic, etc.) as this information is used to calculate your rebate amount,” said Colleen.
“And make sure the company you hire is a Home Performance Contractor Network,” said Shane. “Contractors on this list have had additional training in building science and best practices,” he added.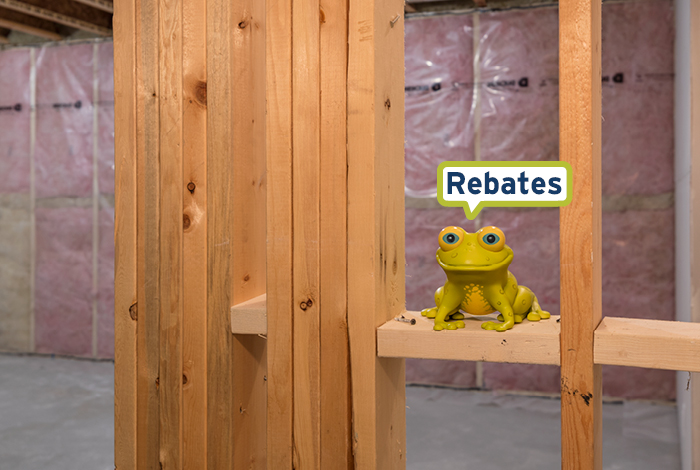
Note: FortisBC recommends that all energy efficiency renovations be undertaken in consultation with and by trained and experienced contractors. FortisBC will not be responsible for your use of the information contained in or linked from these webpages.
In our next blog
Check out the fourth post of this series for our final reveal of Colleen and Shane’s forever home. We’ll also find out how much lower their energy costs are now that their home has undergone a deep energy retrofit to its building envelope and upgrades to their water heater and fireplace. Plus, we’ll show you some of the other upgrades too.
1Terms and conditions apply. Rebate amounts may change and programs may be modified or cancelled at any time without notice. Full terms and conditions are available on the respective program pages.
2Possible maximum rebate when insulating all areas of the home: attic, exterior wall, sheathing, basement or crawlspace walls and other areas.


